Monday, November 19, 2012

Good things GALORE!!!

Hold onto your hats folks!  I've got so many good things to share with you today, you might wanna sit down and take notes!  

First off....have you heard that Stampin' Up! is starting their Online Extravaganza - TODAY!!!


You must check this out.  TODAY only, there are some fantastic items on sale - like the Big Shot!  On sale today, but only today!  


TODAY ONLY DOOR BUSTER SALE - 20% OFF

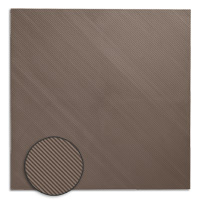
Simply Scored Diagonal Plate
Item #125586 20% off Today Only!
view buy
Big Shot Die-Cutting Machine
Item #113439 20% off Today Only
view buy
Big Shot Doctor’s Bag
Item #113474 20% off Today Only
view buy


Pennant Parade Bundle
Pennant Parade Bundle [wood]
Item #132704 40% off
Also available in clear-mount.
view buy
Snow Much Fun Stamp Set [w]
Snow Much Fun Stamp Set [wood]
Item #122560 40% off
Also available in clear-mount.
view buy
It's a Wrap Occasions Stamp Set [w]
It's a Wrap Occasions Stamp Set [wood]
Item #123590 40% off
Also available in clear-mount.
view buy


There are many more items on sale for the next 10 days also!  You'll want to go check out all of the goodies on my website - JUST CLICK HERE!


Next up:  


While supplies last, we are offering the Sizzix Texture Boutique!!!

'Tis the season of giving, and the Texture Boutique makes a wonderful gift for anyone who wants to create their own elegant embossed art. To help you with your gift-giving needs, we're offering a special value bundle that saves you $5.90. If you prefer, you can also purchase the Texture Boutique alone. Looking for stocking stuffers? Pick up some additional embossing folders.
Texture Boutique Bundle
Item 132700
$39.95 (a $45.85 value)
Includes:
  • Texture Boutique Embossing Machine, 1 Pair of Standard Embossing Pads, 1 Mylar Shim
  • Flower Garden Textured Impressions Embossing Folder-Stampin' Up! exclusive
  • Stripes Textured Impressions Embossing Folder-Stampin' Up! exclusive
Texture Boutique Embossing Machine
Item 132657
$29.95
Includes:
  • Texture Boutique Embossing Machine, 1 pair of Standard Embossing Pads, 1 Mylar Shim

Another super cool thing:

Talking tags!
With Talking Tag, you can send a gift that is uniquely you. Talking Tag is a message label you can attach to cards, invitations, gifts . . . anything! Personalize birthday cards, Christmas gifts or even record quick instructions for a project. Now your pictures really can say a thousand words!
How to Buy Talking Tags:
Buy 'em by the sheet! You get 10 tags for just $7.95 (item 129723).
How to record a voice message:
  1. Download the FREE TalkingTagT App on you smartphone from talkingtag.mobi, iTunes® or Google PlayT.
  2. Adhere the message tag to your card or gift.
  3. Open TalkingTagT App and scan the code.
  4. Record your message (recording starts immediately, so make sure you're ready!).
You will have the opportunity to listen, re-record, cancel, or confirm your message after you've completed recording it. Each label allows up to 60 seconds of a greeting, song, or product message.
To play the message, recipients will need to download the app and scan the code.  Messages are saved for two years, so they can listen to it over and over.

You are still with me, RIGHT??? 

So....a little thing I've been working on...

MY first video.  It might be a little shaky, and it runs a bit long (8 min), and it does have a little typo in the beginning - stampedsilly.blogspot.coM.  But, I did it.  And with one under my belt, you can bet that there will be more to come.  Lots more.  It wasn't as complicated as I thought it would be....so watch. I hope you'll enjoy it!


Sunday, November 18, 2012

Paper Players CAS Silver or Gold challenge #122


That's right!  Let it snow!!!  It's getting to be about that time when I'm wanting some snow on the ground!  I like snow.  And if it's gonna start getting cold....well, it just as well be pretty outside.  That sparkly white stuff is pretty!  

Speaking of sparkly, the Paper Players design team is challenging you to use gold or silver on your project this week!


Is it obvious what color I chose to use???  This was a card that was in my head for Stamp Club, but then I just couldn't get it to work out the way I wanted to.  So, I did what anyone would do.  Took the partial card to "my gals" and asked for some tips.  With their help, this was invented:


It's clean and simple, and a beauty at the same time.  Mask off an area for your ornament.  Then, mix up a little silver shimmer paint and rubbing alcohol in a spritzer and spray your card panel.  Remove mask.  Stamp ornament in Versamark, heat emboss with clear embossing powder.  Then ink up your sentiment stamp with silver shimmer paint using a sponge dauber and stamp it over the top of the embossing.  The paint WILL stick - it won't do the emboss resist that you would expect.  Poke a hole at the top of the ornament, run some silver cord thru it, adhere to back.  Tie and adhere a bow.  Add some twinkly stars and you are good to go!  This one is great for mass producing!


I don't know about you, but I think it's pretty awesome.  Like there is snow coming from behind the ornament.

Now it's your turn to play along with The Paper Players this week - but first be sure to go see what the rest of the design team came up with!

The Paper Players Design Team

Thursday, November 15, 2012

Here, turkey, turkey, TURKEY!


Alright...you guys that know me well, know that I'm not huge into punch art.  But...after I created this owl card, I showed it to the gals at Stamp Club.  It happened to be the same night that we made these same purse dies into bats.  Well, you get a group of gals together that are brilliantly creative, and this little Turkey was thought up.  I just finally got a chance to put the thoughts into action.  (I hope I did it well Denison Gals!)


This actually went together darn quick.  The most time consuming was the corny feathers.  I inked them up with More Mustard and then went right over the top with markers - Always Artichoke, Not Quite Navy, and  Cajun Craze.  Because I didn't wipe the corn cob clean of More Mustard first, it seems to have made the colors more uniform.  Punched a couple of circles for the eyes, used the leaf branch from the bird punch for the waddle and the tip of one of the blossoms for the beak.

And, while I don't love punch art usually, I must say....this guy is stinkin' cute!

I covered up all of the layered corn cobs with a big leaf on the back - was just trying to clean that up a bit.

What do you think?  Good little place holders at your Thanksgiving table?  I'd love to hear your thoughts - just leave me a comment!


Stampin’ Up!® is offering not just one, but two ways for you to get FREE ink!*
NOV. 1–DEC. 16, 2012
*Neutrals Collection not eligible
Host a $450 party!
Not only will you be able to choose a FREE ink collection, you’ll also get $65 in hostess dollars and a 50%-off item!
Join the Stampin’ Up! family!
A free collection of ink pads is a great incentive, but so is a 20% product discount, a demonstrator only magazine, stamping events, and access to an exclusive website with thousands of project ideas!

Contact me TODAY to find out more!


Shine!


I was recently flipping thru an old issue of Cards Magazine and came to a page that I had dog-eared.  The card on the page was that of a sunburst and that's when an idea popped into my head!  I love it when that happens.  Wouldn't a sunburst behind the silhouette of Baby Jesus be striking (and very fitting?).  With that idea, I went straight to work.  Recently, Mr. Jim (aka my UPS man) delivered this Champagne Glitter paper, and I thought that would be perfect.  I started with a Midnight Muse card base, but it just didn't "do it" for me.  So I tried the champagne on Cherry Cobbler.  Much better.  (I think if I had used the silver glimmer paper, the Midnight would have worked fine)  So, this is the card that evolved:


Pretty simple.  And that's what I was going for.  Jesus is the reason for the holiday and this card is all about Him.  I did use the Core'dinations Cardstock in Cherry Cobbler, just for the texture.  I think any embossing would have been too much.

Are you wondering how to do the sunburst?  Easy peasy!  Some companies have a stamp that you can stamp and then cut, and some have dies.  Guess what.  You don't need either!  Create a card front - any size you want is fine.  Here, I've used a 4 1/4 x 5 1/2 card base.  Flip your paper over (so you don't have to erase pencil lines)  Pick the spot where you want your focal point.  Just remember, because we've turned our paper over, the focal spot is going to be on the opposite side.  Now, take a ruler and draw lines out from your focal point to the edges.  You will need an even number of spaces.


The nice thing is, when you do this, you'll get enough bursts for two card fronts.  All you need to do is cut one your lines and you are ready to adhere to your card!  I marked mine so that I know which rays work together.  Didn't I tell you that it was easy!!!

Now, scroll back up.  Look at the Vanilla die cut behind Baby Jesus - can you figure out what die that came from?


Stampin’ Up!® is offering not just one, but two ways for you to get FREE ink!*
NOV. 1–DEC. 16, 2012
*Neutrals Collection not eligible
Host a $450 party!
Not only will you be able to choose a FREE ink collection, you’ll also get $65 in hostess dollars and a 50%-off item!
Join the Stampin’ Up! family!
A free collection of ink pads is a great incentive, but so is a 20% product discount, a demonstrator only magazine, stamping events, and access to an exclusive website with thousands of project ideas!

Contact me TODAY to find out more!


Shine Card Recipe:

Tuesday, November 13, 2012

FINALLY! The 12th Day of Christmas!!!!


Well....the 12th, errr....13th day of Christmas is finally here.  I believe my technical difficulties are behind me...let's cross our fingers anyway.  I always (used to) consider myself computer literate.  Then difficulties arise and I feel like a dumbo.  Anyway.  I'm back up and running.

So, on this last day of Christmas Gettin' Gifty creations, I've whipped up some yummy goodness.  I started off with a mini loaf of homemade pumpkin bread.  Have you noticed the cellophane bags that Stampin' Up! has included in the Holiday Catalog? They are tucked in there - a little bit hidden - on page 34.  You get 25 bags for $3.95.  Talk about a steal.  I'm very impressed with the quality of them.  They are a bit heavier to resist wrinkling - I love that about them.  BUT - what I really like is that they aren't humongous.  Perfectly sized to fit a mini loaf of bread, fill it with some yummy snack mix - you know that kind with the white almond bark on it - we call it Snowman Chow around here!

Alrighty...so I wrapped up a loaf, added a tulle bow, and a little tag using the jar from Perfectly Preserved and die cut it with the Cannery dies.  This was pretty simple, btw.  Just fold your paper in half, stamp it really  close to the fold, then with the paper folded in half, die cut it.  No worries, it'll cut thru both layers!
Cover up the top with the "jar wrapper" image - this is great to use if you miss stamped a bit and cut off the top....

If you are going to give the bread as a little gift, you just as well include some delish butter and coffee too, right?

Whip up some super yummy Cinnamon Honey Butter and put it into a lil' half pint jar. ( I love them - they are so dainty and cute!)  How do you make the butter?  Super easy.  Even easier if you haven't recently broke your hand mixer!

Cinnamon Honey Butter
2 sticks butter (please use REAL butter!)
1 C powdered sugar
1 C honey
2 tsp. cinnamon ( I like to use Pampered Chef's Cinnamon Plus)

Whip this until light and fluffy.  Makes 4 half pint jars and then some extra.  And seriously - I could eat this stuff straight out of the jar - it's THAT good!


Grind up some fresh coffee grounds and voila! You've got a super duper gift for your neighbors, your BFF's, or a Christmas party hostess!

What do you think?  Did you enjoy the 12 Days of Christmas Gettin' Gifty Guide?  I know I had a lot of fun creating all of this goodness.  I'd love to hear your thoughts and comments!  Chatter away peeps!


Monday, November 12, 2012

12th Day of Christmas...DELAYED!

Sorry!  Due to some technical difficulties, I have to delay the final 12th Day of Christmas post until tomorrow!  Please check back soon!

In the meantime....

Stampin' Up! is offering a very Ink-redible promotion this month!


Hostesses who hold a minimum $450 party during the promotion period will receive a FREE collection of Classic Stampin Pads--they can choose from Brights, Subtles, or Regals--a $49.95 value!  Plus, the free ink is in addition to the regular hostess benefits--INK-redible!

New demonstrators who join the Stampin' Up! family during the promotion period will received a FREE collection of Classic Stampin Pads--they can choose from Brights, Subtles, or Regals! It's INK-redible!

With the holidays at our doorsteps this is a great time to join my Stamp Us Silly team!  You'll get a discount on products that you can turn into great gifts for family and friends!  AND...I just had a sneak peak of the absolutely, amazing, to-die-for Spring Catalog.  You can get those products earlier than anyone else.  Did I mention, there will be a discount on those products?  What's more....Sale-A-Bration is also coming.  As a demonstrator, we earn EVEN MORE freebies during that time.  So, for $99, you get $125 worth of fantastic products (that you get to pick) plus an entire color collection of INK!!!  It truly is INK-redible!

Contact me today!

Sunday, November 11, 2012

On the 11th day of Christmas...

Please note: This is my second post of the day!  If you are looking for today's Paper Players post, scroll down or click here.


I got a few treats in this little milk box.  These little milk boxes are a cinch to put together.  My kids love them - and they are great for school gift giving.  Assembly is super easy - and embellishing is a breeze when you use the Make a Mitten with the coordinating punch.  I tied up the top with the stampable cotton ribbon and some sweater soft knit ribbon, leaving the "pouring" side of the carton open for easy access.  Will's class will likely see these in a month and a half at their class party!

Well, folks - I'm off to church and then we've got a birthday party to throw for my little guy who turns 5 tomorrow!  I can't believe he's gonna be 5!!!

The Paper Players Color Challenge #121


We're bringing you a color challenge this week.  For me, this was quite a challenge in more than one way!  I saw Bravo Burgundy, and practically shuddered.  My first thought was....I know what my Bravo Burgundy ink pad looked like, and it's not pretty.  It was the VERY first ink pad I bought.  Back in the day, these were the colors I gravitated towards.  Yeah.  My poor BB ink pad is shriveled and miss colored from lack of use I'm sure.  I even think I heard it groan when I opened it to take a peek at it.  I put that back on the shelf.  I did find one lone piece of BB cardstock, so decided to run with it.  I took a rather clean and simple approach with my card.  In fact, I turned to Clean and Simple Blog for my sketch this week.


In the end, I'm pretty darn impressed with how nicely these colors work together.  I even like my card.

Hope you will make the time to play along with us this week.  Go and get some inspiration from the design team - they've got some superb projects to get you going!


The Paper Players Design Team