Thursday, January 5, 2012
Sweet Sunday Sketch #149
I told you earlier that one of my "goals" for 2012 is to participate in more sketch challenges. So, I might as well start the first week of the year off on the right foot. One of my favorite challenges is that hosted by Karen Giron. I love her sketches and love her work too. I've been following her blog for a LONG time, back when I started Stampin' Up!, and she was still with them too. She has a wonderful way with layering...
Anywho....here is my take on her sketch. I love the fact that she's now keeping her sketches alive for 2 weeks. This gives me another opportunity to play with this one.
I'm not really sure I love what I've done here. It seems a bit fussy for my taste, but I really wanted to try the paper doilies that I see everyone using. I just don't love my mesh of DSP. I like them on their own, but here I think it's too busy or something??? I don't know. I'll try it again in something a little more clean and graphic.....
Recipe:
Paper: Baja Breeze, Ridinghood Red, Whisper White, Basic Grey and Twitterpated DSP
Stamps: P.S. I love you, Heart to Heart
Ink: Basic Grey, Ridinghood Red
Other: Tasteful Trim Die, Rhinestone Jewels, Pinking Circle Die (Nestie), Paper Doily
Labels:
PS I love you,
Valentines
Wednesday, January 4, 2012
New Mini Catalog is LIVE today!!!
Click on the photo to see a pdf copy of the catty.
Starting TODAY! you can get your hands on the new awesome products in the 2012 Occasions Mini Catalog!!! Oh....and Stampin' Up! has stepped up it's game!! We all know that they offer the best products on the market in terms of quality and design, so to know that they are finally jumping into the pond of nestable dies....I'm just giddy with excitement. These dies are made with awesome quality and are much larger than those other favorite nestable dies I've used in the past. Let's cross our fingers that they keep on offering more, more, more!!!
Click on picture to see in full!
Exciting stuff for today - see ya back here tomorrow for much more!!!
Tuesday, January 3, 2012
Technical Tuesdays
Greetings....Tuesday's are release days for new My Digital Studio downloads. I always look forward to Tuesday's because you just never know what the powers that be at SU will come up with next. I especially like the fact that usually the designs that they come up with are unique to My Digital Studio...and I even sometimes wish that they would/could release them in actual paper....Like that Number One Kit above...Those papers look super cool. However, I can use the papers digitally to no end....I love that.
What are you doing with MDS? Would you like to learn more about the things you can do with it? In the coming year, I am going to devote Tuesdays to the technical aspect of MDS so that you can learn and USE your program.
One thing I get asked most frequently is: How do I print an A2 card at home so that the card front does not print right in the middle of the paper?
Here are the steps:
- Open card template in MDS.
- Create card, then duplicate that card (so that you can print two of the exact same card on one sheet of paper. To duplicate, right click on the card's icon at the bottom of the page, and insert duplicate page.
- Go to file, page setup. Change your margins to 0. My computer won't change to completely zero, but it's close.
- Now click on the print icon. Select your two card fronts. Down in the lower left corner of the print screen, click on advanced.
- Change the first section (Size of Image Area) change that to Custom, width 5.3, height 4.1 (if you are doing a landscape A2 card). Depending on your printer, you can adjust these to as big/small as you need, in order to get your image just right.
- Now go down to Image Layer adjustment and change that to Custom Layout. You will want to adjust your top margin so that your card front moves down to the bottom corner of the page.
- Now, in the center of the screen, change the number of images per sheet to 2. This will put your second card on the page (as long as you had initially selected both of your card fronts)
- Lastly, click okay, then click Print!
I hope this helps you out, and PLEASE feel free to comment or email me with any questions. Now, go have fun with My Digital Studio.
Monday, January 2, 2012
Sparkly snowflakes....
Heidi Ho Friends....
Just popping in to show you a quick card. This one combines some wool felt that I've had stashed in my craft room closet from my old sewing days. ( I used to do a LOT of sewing before children - It's dangerous when I open the "sewing closet" door - I kinda miss sewing!)
I did completely CASE this card from one by Dawn McVey. I won't pretend to have come up with this one on my own. When I saw her card....I just couldn't resist. Pure beauty!
I'm secretly hoping that SU comes out with some similar dies in the future. I'm also crossing my fingers and toes....I hate to buy from other companies, but sometimes I just can't resist!!!.......
That's all for now!
Sunday, January 1, 2012
Happy New Year!
Happy New Year to all of you! I hope you rang in the New Year safely and are ready for a fresh start to 2012! I have so many grand plans for twenty twelve and am anticipating a successful, fulfilling year. I'm entering into this New Year with my head held high and I'm going to face some of my obstacles head on!!!
Do you make resolutions? I've got a few. I've already mentioned before that I plan - or am resolutioning? - to make an appearance on this poor neglected blog more frequently! I"m off to a good start - right???
I'm also putting on my goal list - I REALLY want to earn the Stampin' Up! trip to Fiji. With half way to go, I'm just under the half way mark. And, with my head held high, I
That leads me to the photo collage above. Let me introduce a new little venture that I'm getting involved with: Artisan Studio. Artisan Studio is a new cooperative of artists opening up in Woodbine, IA. It will be opening this month and I will be teaching monthly classes of various sorts there. Sometimes I'll have more than one class/month. The collage above is a collection of the cards in my first class. Here are the deets:
What: Everday Enchanted Daisy Card Set and Box Attendees will make 6 cards (envelopes included) and a sleek box to hold them all. If you are looking for quick and easy cards to make that have a real "wow" factor, then this class is perfect for you! Plus, you'll get your hands on some great newly released
When: January 25th, 6:30pm
Where: Artisan Studio, Main St, Woodbine, IA
Fee: $30 - all supplies are included, you just need to bring scissors and adhesive - and yourself!
Deadline to sign up for this class is January 14th.
I will also be holding the same class in the Denison area, with date and time to be announced early this week. Along with that I will be posting my class schedule for the next 6 months so that you can plan well in advance.
Is there anything that YOU would like to learn about? I love to teach new techniques (even OLD techniques) Leave me a comment with the things YOU would like to learn in 2012 and I'll try and work them into my class schedule! And if I can't work them into my hands on classes, you might just see them here on the ol' blog as a video class!!! :) That's another little fun thing I'm working on...video tutorials. I'm telling you - 2012 is going to be so much fun, I can hardly stand it!
Friday, December 30, 2011
Winter Wishes
Well, it doesn't quite feel like Winter here in Iowa. We've been having temps in the 40's and 50's which is about 20-30 degrees above normal. I'm okay with the temp - I'm not okay with the lack of snow....that's right - those of you who know me well, know that I like my snow. My boys are on Christmas break, and we haven't even been ablt to go sledding....one word.....boooorrrrinnngggg!!!
Today, I'm sharing with you some cocoa packets that I made for a couple of recent craft fairs. These were a popular item. This one that I'm showing today was made with some retired DSP and a non-SU stamp set. (I had to pay for that stamp set somehow...so put it to use!)
I stamped the belly band with images from Winter Post (one of my all time fav stamp sets). The belly band slips off to reveal a card of cocoa! I found the template over on Debbie Olson's blog.
Pretty darn cute - huh?? My Stamp Club gals had fun making these also....just a different version.
Okie doke - I probably won't be back until New Years Day! We've got a football party to go to tonight and Christmas (the last of 6) to go to tomorrow....But, I swear, I'm gonna start the year off right by making a darn good attempt to blog (almost) daily. Back me up here peeps - I wanna hear some comments from all of you!!!
Have a great New Years - see you in 2012!
Thursday, December 29, 2011
Well...I told you I'd be back with some goodies I created with the new DSP out of the Sale-A-Bration catalog that will soon be live. Here is one of those said goodies! Oh - I just am in love with the DSP - it's called Everyday Enchantment - and let me tell you, lately, I've been enchanted with it everyday! It sets on top of my desk, and I'm about to embark on my second package of it already! :)
These are cute little notepads I created to sell at some craft fairs before the holiday. I have been infatuated with a stamp set by another company that is geared towards notes. Well, I kind of recreated that stamp set in My Digital Studio, and have printed a couple of sheets out in a couple of different colors. I'm crossing my fingers that Stampin' Up! will release a similar set soon. Until then, MDS will fit the bill!
That little bit of organza ribbon that you see - it too is a Sale-A-Bration item. It comes with 10 yards of Lucky Limeade, 10 yards of Calypso Coral, AND some rocking cool printed brads. I'm currently hoarding the brads - I just drool on them and put them back on my shelf. I can't bring myself to use them!!! :)
Wanna know something really cool? During Sale-A-Bration (Jan. 24th - March 31st) if you hold a qualifying workshop, you automatically get the DSP, Ribbon and Brad bundle and a matching stamp set free! That's in addition to the other benefits that you get anyway!!! If you'd like to earn tons of free stuff, contact me today and we'll get a workshop for you on my calendar.
That's all for today folks!
Wednesday, December 28, 2011
Stamping 411's Saturday Sketch Challenge
Hi-dee HO folks! I know I've been pretty skittish on the ol' blog. I am planning to resolve that here in the near future. I've got quite a few new things planned for the New Year, and I'm including "scheduling" some time in each day to blog. I feel like I've been letting a lot of you down by not being here consistently, and I don't want to feel that way. So, blogging is making it onto my New Year's Resolutions List! My hope is to inspire YOU more in the coming year. I just need to MAKE time to be here.
One of the other things that I would like to accomplish more in the coming year is to participate more regularly in sketch challenges. I'm starting out this week with a sketch from Stamping 411's Saturday Sketch Challenge:
This is what I've created:
Alrighty - that's all for now.....more to come!
Tuesday, December 13, 2011
What I've been up to...
I have been BUSY! To say the least! Seems like one rollercoaster ride after another these days. As soon as I feel like things are non-chaotic, they blow up again. I know we all feel that way, especially this time of year. I thought the holiday season would be much calmer when I made the move to stay home with the kids a couple of years ago....but really, they aren't!
Anyway...let's move on. One of the projects I had to tackle a couple of weeks ago was for a photographer in a nearby town. She wanted me to "play" with a couple of her pictures and make some cards out of them. I fell in love with this winter scene from the town of Woodbine, IA - where she resides. In these parts Woodbine in known for it's brick main street. Well, and cowboys and camo too. The photographer is working to open up Artisan Studio in Woodbine. It's a co-op of sorts for artists and such. I will start teaching classes there once a month starting at the end of January. And I'm super excited about the opportunity!!!
So, back to this picture. She had an pre-open house event at the beginning of December and wanted as many cards with this picture as I could do. The bad part about that was, we met on a Tuesday afternoon, and I had a craft fair coming up on Saturday that I really needed all of my free time for to create for that. BUT, I pushed that aside and told myself that I would take ONE DAY to create as many cards as I could. These are three of the 8 designs I did. Guess how many cards I can make in one day??? (without going bonkers?) 41. That's right 41 cards in less than 24 hours, using 8 different designs (which were all very similar to each other) That first one above, I made 20 of it. I knew because I incorporated 'from Woodbine, IA' on it, it would be a mover and a shaker.
This one was very popular too. I simply die cut the holiday from sticky pages and stuck it on the project and glittered it up. Oh - I did outline the word before I peeled the red liner off and glittered. It needed that. Otherwise it was far too blah!
This one I heat embossed the "be still" in Cherry Cobbler EP and die cut the Peace from the Silver glimmer paper. Very striking in person.
So, this was one project that kept me busy for - will a mere 24 hours.
Now, I need to go and design my class for her.
FYI - for those that are local - the photographer is Bracinda Blum. You can contact her at bracindablum@gmail.com if you would like. Her Artisan Studio is set to open Jan. 1. I can't wait~!~!
Saturday, November 5, 2011
Scrap Club page
Hiya! Guess what? Today I'm sharing a scrapbook page. Yeah. You heard me. A scrapbook page! I know, I know. I don't usually post these. Primarily b/c they are hard for me to photograph; as you'll see in the poorly produced photos below. But also because I rarely put pics on my pages. That reason....b/c I rarely print my pics!!! They sit stuck on my computer for.ev.ah! It'll be my goal in 2012. I really kinda like the pages I come up with, I just need to add some pictures to them. Here's the deal - I typically only scrapbook (if you'll call it that) when I need to come up with pages for my Scrapbook Club. Seriously. And you know what. When I'm done with those pages, I'm usually really proud of the outcome. So, it's not that I don't like to scrap, it's just that I'm not terribly comfortable with it. Isn't that funny. I can create a card in a jiffy. I may not always love the results, but I feel like I'm not out a lot. When I create a scrap page, I feel like I better do the process justice or I've wasted a ton - of paper, of time, etc. Yet, I'm usually really happy with my end result. So, I just need to do it more.
Anyhow....here's one of the pages we created at Scrapbook Club in Sept.
I LOVE these leaves. Simply die cut with Leaves #2, inked with the Woodgrain stamp and then crumple the $%!& out of them. They turn out lifelike everytime.
What do you think? Love it. Just so-so??? I'd really like to know. Please comment....Puh-lease!
Friday, November 4, 2011
Last day Christmas Stamp A Stack options + details!
Okie Dokie --- Here are the last two cards in Round One of my Christmas Stamp A Stack.
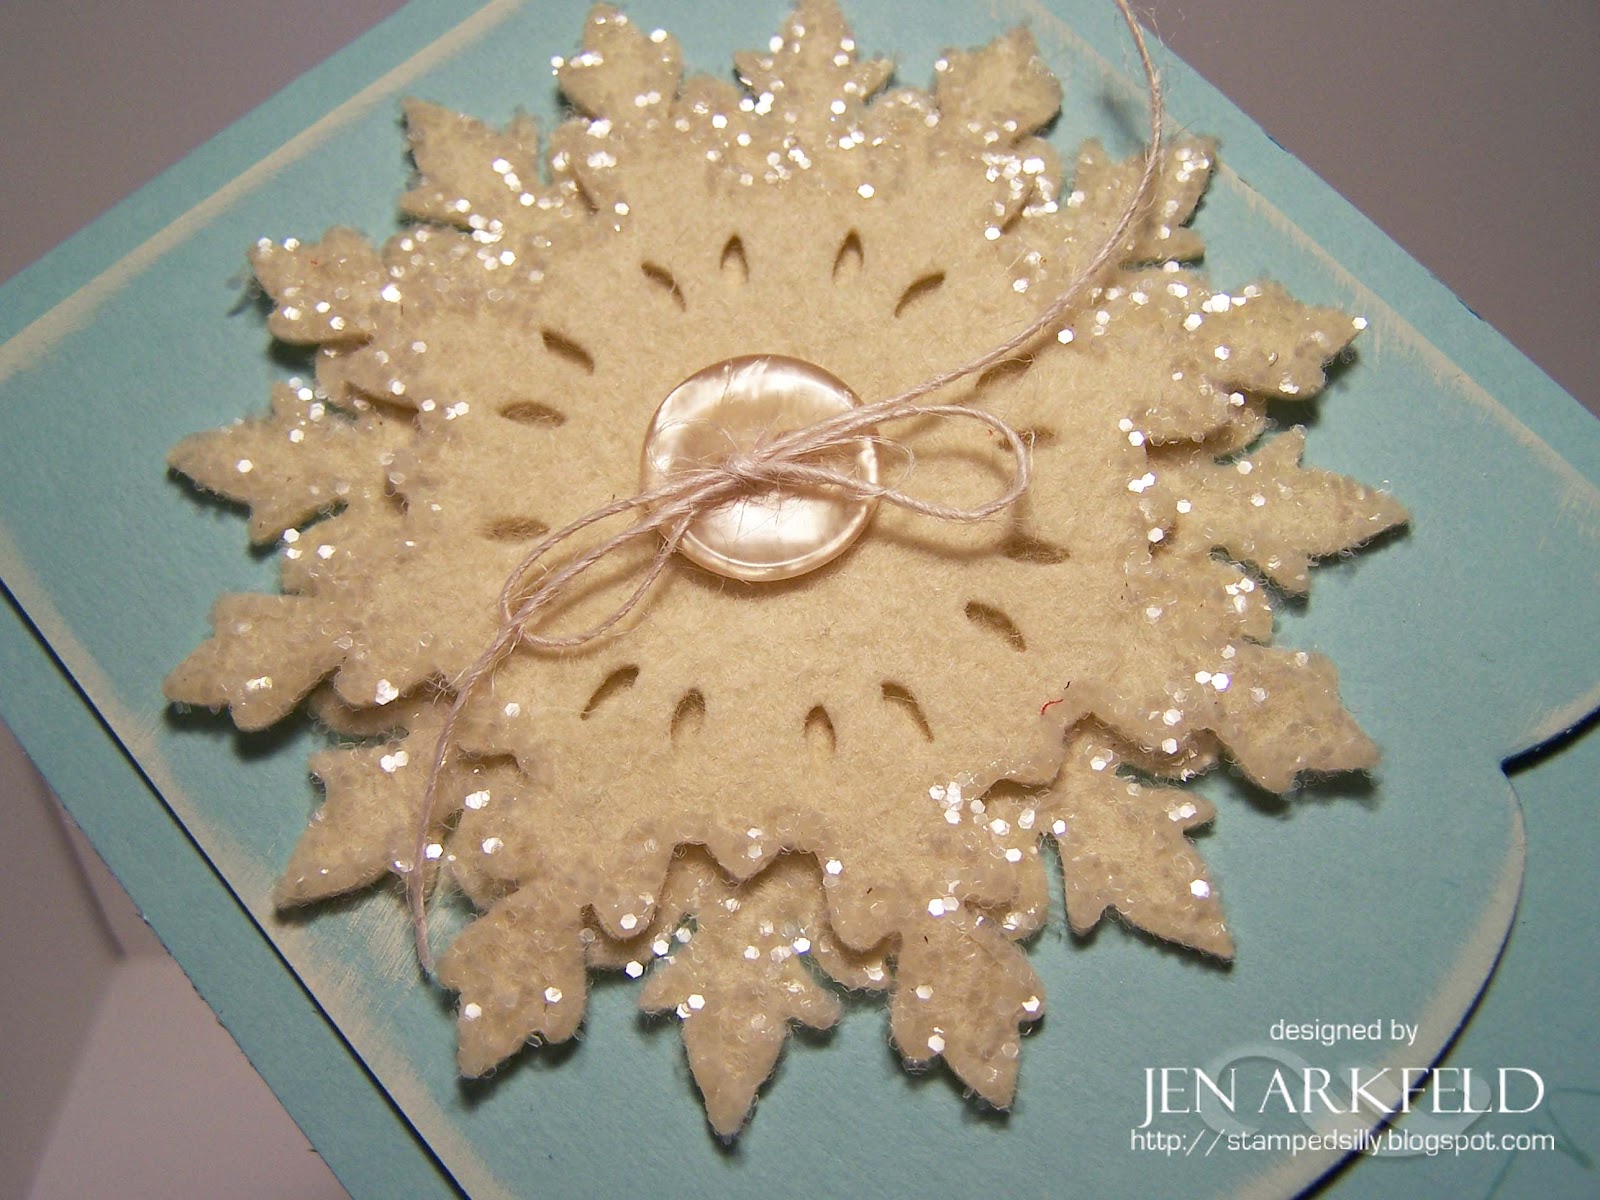
Card #7 - Snowflakes of Noel
The snowflakes are edged in glitter to add some pizzazz.
Don't they just sparkle beautifully??? We had a touch of snow the other day.....ALMOST wish it would have stuck around...ALMOST!
Card #8 - From Our House to Yours
Alright - first off.....I couldn't help it. I pulled out a retired set for this card. It's one of my fave sets, and it just worked so perfectly with this card. So, sorry - but I HAD to do it. So, that being said, many of you have asked for a card that can include family photos. This is it!
Here is the card completely closed - it's got a lip there, and is a tri-fold card.
Here's what you see when you open the first flap. I went over the top of the flourishes with some Smooch - they aren't blurry, it just didn't photograph well.
Here it is partially opened. Again, the glimmer in the smooch is just reflecting oddly.
And fully opened. Here you have three spots where you can attach photos. Don't have that many photos - not a problem, I'll show you how to fill in the blanks!! That's the joy of having ME as your teacher and guide!
So there you have it - the first round of cards for the 2011 Christmas Card Stamp A Stack. Now the nitty gritty!
Of these eight cards, you pick the cards you'd like to make. I cut you 10 of that card and put them in a "stack" for you to stamp and assemble! It's a great and quick way to get cards made - I'll do half of the work for you!!! In the time allotted, you can complete 2 "stacks" and some of you could easily complete 3 stacks. You will work at your own pace, these cards will be set up in stations. Can't decide? Split a stack with a friend!
When: November 19th; 9am - 1pm
Where: Denison Municipal Utilities Bldg, Broadway and 7th St
Fee: $20/stack - all supplies are included - you just bring your adhesive!
Can't make the class? Not a problem, I will do all the same as above, and mail you the unassembled supplies. The fee is the same, plus the cost of shipping.
Please register and prepay by November 12th. You can call me (712-269-2714) or email me ( thearkfelds at fmctc dot com ) with your options. Let me know if you have questions!
Thursday, November 3, 2011
Day 3 - Christmas Stamp A Stack options...
SO.....I'm back again....see! Have faith in me....I can blog! I really can! It's all about taking photos of my work and getting them on this computer. That's the key. Take the pics. I can tye during commercials of Revenge (my new fav show btw!)
Task at hand.....Christmas Stamp A Stack Day 3. Here are two more cards that you can make if your heart desires.
Card #5 - Sparkly Ornament
When laying closed, it shows off more of the scalloped edging, and the use of three different greens. I like that monotone look with the punch of color. and the glitter, and one single rhinstone. It just says "Ka-chow"!
Card #6 - Skating on Ice!
When I asked Will, who is five, what he thought about this card, he said that it looks like the skaters are cold! It does have a wintery look, that's for sure! This card involves some heat embossing and sponging - the emboss resist technique. One of my favorites! It's like magic.
I think the strip of glitter sets this card off. It really needs that bit of glitz.
Alright - I'll be back tomorrow with the last two cards in the offering for Round One Christmas Stamp A Stack. I'll have all of the details for you as well. Round Two will shortly follow. It will include these cards plus 6 completely new cards! Stay tuned for deets!!!
See ya all tomorrow.
Labels:
Christmas stamp a stack
Wednesday, November 2, 2011
More Stamp-A-Stack options...
Heidi Ho! I told you I'd be back...
I'm popping in with some more card options for my Christmas Card Stamp-A-Stack, so let's jump right in shall we?
Card #3 - Dashing Dasher
Ol' Dasher is quite dashing when done up with Cherry Cobbler Embossing powder. I have a thing for heat embossing this year! I'm just warnin' ya! This one too is quite easy to put together, and is so striking in person!
Card #4 - Musical Stockings
I'm going to throw this out there right away - this card might be a bit trying for some of you! :) First off, the music notes are done with a wheel. I know how some of you feel about that! The polka dots are stamped multiple times, so require some lining up - but that's not all that difficult - for real! Threading the jingle bells might actually be the hardest part about this card!! But they are so worth it....cuz - hello - they are so stinkin' cute!
Anyway - it's not a terribly hard card - but just requires some patience!
So, there you have it - the next two cards in the line-up. I'm still waiting to here what you'd like to see in a Christmas Card. What are you thinking of these designs?? What would you change? Please leave me a comment or two - I really need some input here folks!! It's simple - just click that comment tab below!
Tuesday, November 1, 2011
Hello Friends! I know, it's been awhile. I know, I know, I know!!! I've been a bad blogger - and I'm terribly sorry for that. It's just life. Life gets in the way sometimes and unfortunately it's the blog that takes a back seat. So....let's get after it, shall we?
I've been working feverishly on some Christmas Cards for my annual Christmas Stamp A Stack. This is where I need YOUR help. I honestly need to know what you think of these cards. I have been feeling as tho I'm in a creative slump, and it seems like no matter what I come up with they just aren't screaming - THIS IS IT! at me! So, please tell me what you think of my first couple of creations.....
Card #1 - Christmas News
This card might have a clean and simple look to it, but the inside holds a whole lot more. Many times I'm asked to create a Christmas Card that can accomodate a newsletter. Well, I actually spotted this card on Kristina Werner's blog a year ago, and held it in my memory bank for this year. I've transformed it to a Stampin' Up! card, and I'm okay with the final product. And it's definitely mass producable. The sentiment is heat embossed with White EP, and the rest is a matter of folding and adhering paper. Pretty quick and simple.
Card #2 - Peaceful Dove
This card again is pretty clean. And, also very easily mass produced. The image is heat embossed with some faint accents of watercoloring. There is nothing difficult about this card at all.
On this last pic, you can see a little better that this card is on Shimmery White Cardstock. Oh, it adds sooooo much to a card.
Alright - these cards will be in my Christmas Stamp A Stack lineup. This event will be held on November 19th at 9am - 1pm. You will have plenty of time to complete 2 "stacks". I will be posting more details shortly. I will also continue to post more cards this week ( I have about 15 cards done) and would like feedback on them. So, your turn. Leave me a comment about what you like, what you'd change, what you don't like. And please, be very honest. I can handle constructive critisism - I'm not afraid!!! I'd also like to hear what YOU'D like to see in a Christmas Card.
Thanks all!
Sunday, October 16, 2011
On Opportunity to DIE for!!!
***Edited to add - I am going to keep this post at the top of the blog for a while. Be sure to scroll down to see new posts!***
Wow! If I wasn't a Demonstrator, I 'd be signing up to get one. If you already got one, no worries, how about $100.00 of free stuff?
Check out more information here.
If you've been looking for an opportunity to do what I do, while getting a 20% discount on your favorite products, now is the perfect time! During October, you'll get a FREE Big Shot when you join my awesome Stampin' Up! family as a Demonstrator. Use the Big Shot die-cutting machine and Stampin' Up!'s exclusive dies (dies are sold separately) to create uniquely beautiful projects in a flash. In addition, the new-demonstrator Starter Kit--a steal at just $175--contains over $345 worth of stamp sets, card stock, ink, accessories, and business supplies-everything you need to start your new business.
There are so many benefits of being a Stampin' Up! demonstrator, including
•A 20 percent product discount! •A free monthly issue of Stampin' Up!'s demonstrator-only magazine, Stampin' Success!
•Sneak peeks at brand-new products!
•Invitations to exclusive Stampin' Up! events!
•Regular get-togethers to stamp!
•Free access to an online community of 30,000+ crafters/stampers and creative artists, as well as 160,000+ project samples!
•Plus, access to an exclusive video and training for your new Big Shot!
Don't miss this BIG deal! Contact me today to learn how you can take advantage of this great opportunity and get your FREE Big Shot! I would love to answer any questions you might have.
Joining is easy and can be done on-line and you can begin placing orders right away!
Labels:
Big Shot
Subscribe to:
Posts (Atom)


