Monday, March 16, 2015

Sympathy Card Class

Hey all!  Time for something new here!!!

I've had many ask for the classes that I teach locally, as an "in the mail" option.  Well.....ask and you shall receive!

Here is my latest Boxed Card Series - Sympathy Cards.


I'm offering this class as two options for long distance shipping. (US only)  

1) PDF only - you'll get instant access to the PDF directions.  This includes a detailed supply list, cutting and assembling directions, along with project photos.
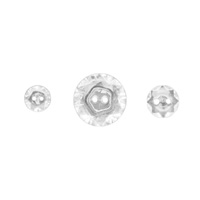
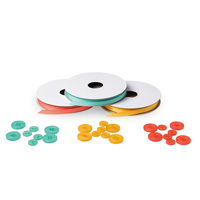
2) Card Kit + PDF - you'll receive all the consumable supplies (cardstock, ribbon, buttons, etc) to create 10 cards, plus a handy storage box to keep them all organized.  This will arrive in the mail, delivered in a bubble mailer via US Priority Mail.

* PDF is delivered by a link you'll receive upon check-out from PayPal.


Kit Options

post signature

Sunday, March 15, 2015

Creation Station: Easter!


Happy Sunday everyone!  

The Creation Station designers are here this week to inspire you to create some Easter themed projects, highlighting the For Peeps Sake and Lotus Blossom Stamp Sets.

Let's get this party started:


My last several blog posts have featured Watercolor techniques, so I feel like I can't let you guys down today!  Here I've created an entire background on watercolor paper with inks and....water!

I simply squish (very important technical term!) the ink pad onto a silicone craft mat - but a page protector or window sheet work great too!  So, squish your ink pads onto the craft mat, placing the colors close and possibly slightly overlapping.  Then spritz with water, let the colors run together a bit - I use my finger to blend them slightly.  Now you plop your watercolor paper into the colors!  Simple.  If you aren't happy, keep tapping your paper into the colors until you are.  
To get the water droplet look, I simple drip water onto the paper then soak it up right away with a paper towel.  
To get it to dry quickly, I use my heat tool.   
In the end, you end up with what I think looks like a dipped Easter Egg!

I used a similar technique for my tag on this berry basket.  Here I wet the tag with water first, then dripped color onto the tag and picked the tag up and turned it to get the colors to blend more.  

One last project......


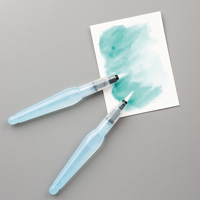
Yes!  More watercoloring!!!  This one uses the beautiful image from Indescribable Gift.  I watercolored it with an aqua painter, using Strawberry Slush, Mossy Meadow and Early Espresso.  


Well....that's the end of my inspiration for you today!  I know that the rest of the design team has a bunch of great things for you tho, so please continue on using the buttons below!


post signature

Friday, March 13, 2015

Make your Own Thickers....(Dimensional Letters)


If you've been around the scrapbooking/stamping world awhile, chances are you've stumbled upon Thickers in your day.

If you haven't been around - Thickers are dimensional letters that are stickers - they are thick.....thick+sticker= Thickers.

But, why not create your own?  It's super easy, and probably less expensive than those Thickers.  

1) Grab some card stock - any color!
2) You'll want some adhesive sheets - I happen to prefer Transfer Adhesive Sheets
3) You'll want fun foam!  Yep - that stuff that your kids use to create things with.  (there is a link to a source below)
4) Take your card stock, slap on an adhesive sheet, attach that now sticky card stock to the fun foam.
5) Grab your favorite die and cut out whatever your heart desires!
6) Adhere to project - I prefer Tombow Mono Multi Liquid Glue....it's strong....super strong.  
7) You're done.....Admire your work!


Look at the dimension you get!  I love it!  

In case you need more instruction - here's a video I did a while ago:


Supply List:


post signature

Thursday, March 12, 2015

Hello Sunshine!


We have been enjoying some much warmer weather here in Iowa - FINALLY! Makes me really anxious for the grass to turn green and the little leaves to start popping out of their buds.

I just have a quick card for you today....  it features yet another watercoloring technique!  Don't worry, I've got more watercoloring to share with you still!


We concentrated on the watercoloring technique at my monthly stamp clubs this month.  It's so much fun, and isn't strictly about watercoloring an image.  For this one, I put some ink down on a silicone craft mat and spritzed it with water, then smooshed my watercolor paper onto the ink puddle.  

What do you think?  Have you tried this yet?

Wednesday, March 11, 2015

Watercolored Corner Garden - Stampin' Up!


Hi-ya! I've been on a watercolor kick here lately.  And I'm loving it!

I've had aqua painters for years, just don't know what I've been waiting for....they are so easy to use.  

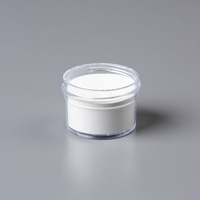
For this card, I embossed the image with white embossing powder first.  Then I used the ink pads to pick up the ink to color with.  This was very simple - I could go over the entire flower, and not worry about the embossed part, because the embossing resists the ink.  Then I could go back and add more ink for shading, etc.  I have to remind myself that watercoloring doesn't need to be absolutely perfect.


What do you think of the watercolor trend?  Are you using this technique a lot too?  Would love to here - leave me a comment....


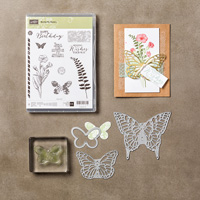
Product List

post signature

Wednesday, March 4, 2015

You're Wonderful....Stampin' Up!


Hey!  We have finally finished up our basketball season.  This means a little less running for me, and let's hope for some more crafting!

Like with this beauty of a set - You're Wonderful!  WOW....this set has it all.  All that I love - changeable sentiments, something to color, and something bold!

This was pretty simple - I stamped the flowers, colored them up with some Bermuda Bay, Pink Pirouette and Wild Wasabi blendies.  Then drew a line to connect the two stamped images.  


I stamped the sentiment onto vellum with some Memento Black Ink, and quickly added some clear embossing powder, then heat set it.  I love the shine it gives that large sentiment.  Then, I just needed to add the wording I wanted.  (This would have made a great Mothers Day card too)

I mentioned that we are done with basketball.....I might be a little sad to see it end.  I didn't make it to many of Will's tournament games because of prior obligations.  He was on a team of 3rd graders that participated in some tournaments in the area.  Most of those tournaments they played against 4th graders.

Here is Will in one of his last games of the year (in the red):


The boys really played well together, especially for their first year, and they showed a ton of improvement.  I can't wait to watch them next year.  
Until then, we'll watch some baseball....his first tournament is in 5 weeks! (yes.....he's my athletic kid!  We joke that if there was such a thing as Competitive Farming; Alex would be all over that! And Aubrie....she'd love it if we signed her up for dance...we'll see!)

post signature