Hey there! It's time for another project tour from the Creation Station Designers!
Let's talk Halloween this week - shall we? We're going to focus on the Fall Fest Stamp set, and the Tiny Treat boxes from Stampin' Up!
I don't go crazy for Halloween, but it is a fun holiday, and my kids love it! For the candy, I'm sure. So let's take a look at a few things I came up with. (don't mind the bad photography today....not sure why I've got a "halo" effect around the bottom of my photos.....)
First up is this really cute card.
I started with a black panel and added some stars using embossing paste and our stars decorative mask.
The pumpkins from Fall Fest were perfect on here. I layered them with Stampin' Dimensionals, doubling the dimensionals to be two thick for the squatty pumpkin in front. This really helped to add depth.
I finished it off with some Blackberry Bliss ribbon and a silver basic button.
Next up, I created a treat holder using our Hamburger box die. This went together quickly.
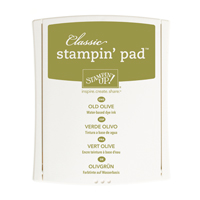
I stamped the ghost onto black cardstock with Whisper White ink and heat embossed it with white powder. Added a little pumpkin friend, and tied the box up with some burlap ribbon, Blackberry Bliss ribbon and a bit of Old Olive two tone trim.
Lastly, I created a simple, but cute treat container. (this would be perfect to gift to a neighbor, a teacher, or keep on your kitchen counter.....or on your stamp desk!)
I wrapped some DSP from Monster Medley around the jar. ( You can grab these jars from your box stores on the cheap!) The 12" strip of DSP did not go all the way around the jar, so I had to piece it together. To cover up the seams, I die cut a piece of black cardstock with a Windows framelit, and trimmed off 3 sides, so I just had the top curve. This kind of mimicked the shape in the jar. It also gave me a non-busy base to add my ghost and pumpkin.
To complete the jar, I added some Blackberry Bliss ribbon and a tag - die cut from the Hamburger Box die, and stamped with Enjoy from Num-Num.
I hope you are inspired to create something fun for the upcoming Halloween Festivities!
Be sure to travel along our blog hop for inspiration - use the buttons below to see what our team has dreamed up for you!

Learn to create your own embossing paste, make your own stencils, and lots more!
New Online Class - Envelope Punch Board Class
Create 5 boxes! Not envelopes! Using the EPB!


